Open the access log of any WordPress site that has been online for a month and you will see the same picture: a stream of requests to wp-login.php, xmlrpc.php, ?author=1, and to plugin endpoints that your site does not even have installed. Almost none of that traffic is human. It is vulnerability scanners looking for a plugin with a published CVE, brute-force bots trying credential lists, scrapers pulling your content, and spam bots hunting for open registration forms.
Every one of those requests costs you the same PHP worker and the same MySQL connection as a real visitor. A firewall that works at the application level solves both problems at once: it stops the attack and it stops paying for the attacker’s traffic.
This guide shows how to configure IP, network, country and rate-limit filtering with the Security by CleanTalk plugin — the Security FireWall, Web Application Firewall and Traffic Control modules — and how those options compare with the other common ways to block unwanted traffic.
What Security by CleanTalk is
Security by CleanTalk (SPBCT) is a WordPress security plugin that combines a cloud-driven firewall, a malware scanner with auto-cure, brute-force protection, 2FA and a vulnerability checker for installed plugins and themes. The filtering rules are not stored in your database — the plugin syncs a blocklist from the CleanTalk cloud, which is built from attack data collected across every site in the network, so a bot that was caught attacking someone else’s site is already known when it reaches yours.
The plugin itself is free and has no PRO version; it works together with the CleanTalk cloud service, which starts at $9 per year after a free trial. All plugin features are available to every user — there is no feature gating between "free" and "paid" builds.
The three filtering layers in the plugin
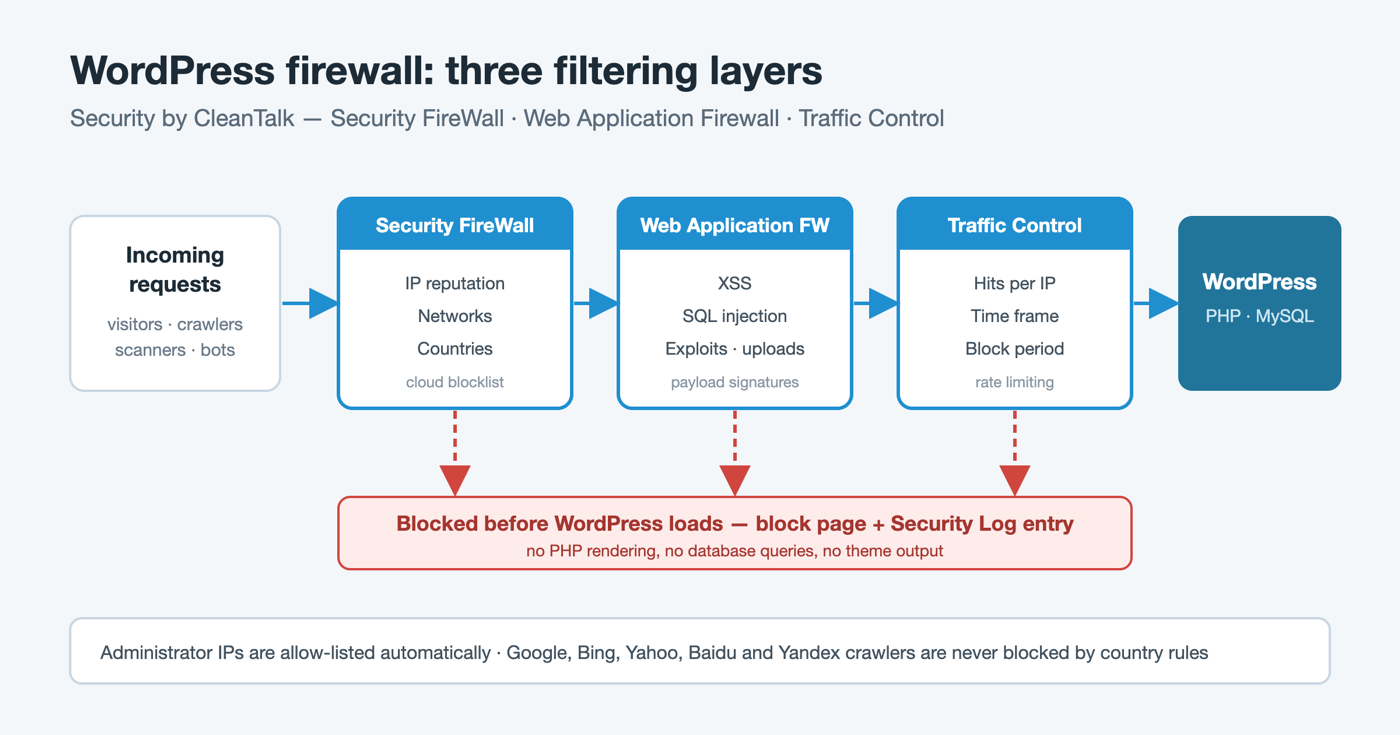
The plugin does not have a single "firewall" switch. It has three modules that run at different stages of a request, and they are worth understanding before you turn anything on.
| Module | What it decides | Data source | Where the block is logged |
|---|---|---|---|
| Security FireWall | Should this IP / network / country be allowed to reach WordPress at all? | CleanTalk cloud blocklist + your Personal Lists | Security Log, cloud Security Control Panel |
| Web Application Firewall (WAF) | Does this request contain an attack payload? | Signature checks for XSS, SQL injection, known exploits, malicious uploads | Security Log, cloud firewall log |
| Traffic Control | Is this visitor requesting pages faster than a human would? | Hit counter per IP inside a time frame | Security Log, cloud Traffic Control log |
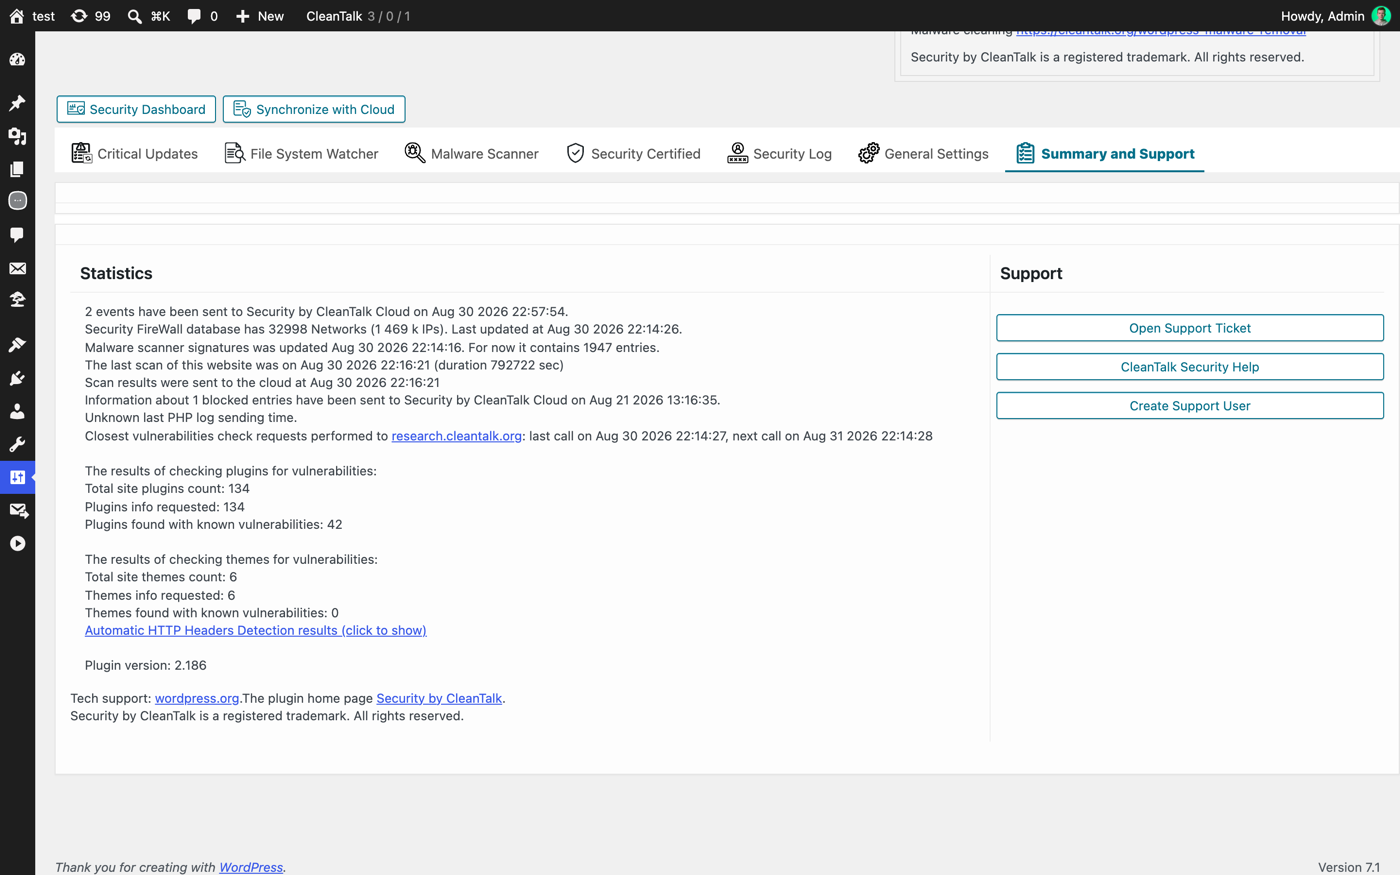
Security FireWall is the cheapest layer: it answers before WordPress finishes loading, which is why the plugin describes it as an option that "reduces CPU usage on hosting server and accelerates pages load time". On the site used for this article the synced blocklist held 32,998 networks — about 1.47 million IP addresses — and it is refreshed continuously.
WAF is the payload layer. It inspects HTTP parameters for Cross-Site Scripting, SQL injection, known exploit patterns and file uploads containing malicious code. This is the layer that matters when a plugin you have installed turns out to be vulnerable — CleanTalk’s research team adds signatures for vulnerabilities as they are found, and the plugin’s Critical Updates tab warns you when an installed plugin has a published CVE, including ones that are not yet public, so the site is covered in the window between disclosure and the vendor’s patch.
Traffic Control is the volume layer: it does not care what a request contains, only how many requests one IP address makes inside a chosen time frame.
These layers are complementary, not alternatives. A scraper with a clean reputation passes the Security FireWall and is caught by Traffic Control; an exploit attempt from a residential IP passes both and is caught by the WAF.
How to set up the firewall step by step
The whole setup takes about five minutes.
1. Install and activate the plugin
In the WordPress admin, go to Plugins → Add New, search for Security by CleanTalk, then click Install Now and Activate.
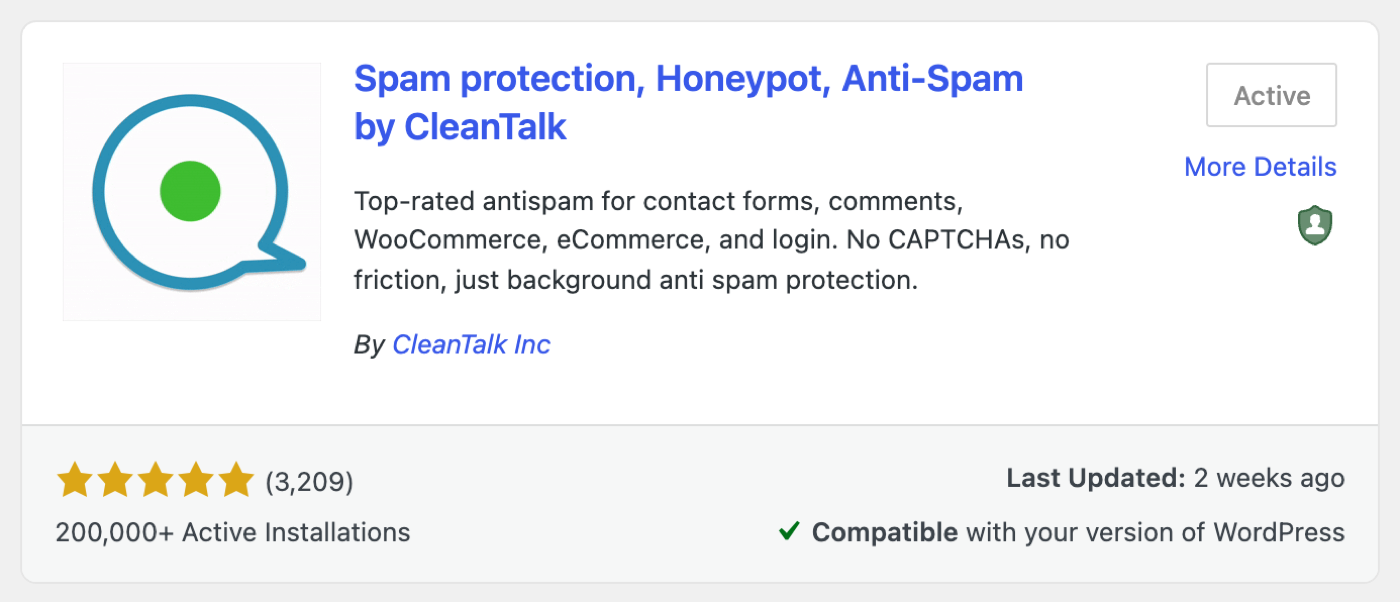
If you prefer to upload the archive manually, download it from the plugin page on WordPress.org and use Plugins → Add New → Upload Plugin.

2. Get the access key
Open Settings → Security by CleanTalk → General Settings. The Access Key field sits at the top of the page. Click Get access key automatically — the plugin registers the site and fills the field for you. Without a key the cloud blocklist cannot sync, so the Security FireWall has nothing to filter with.

3. Enable the Security FireWall
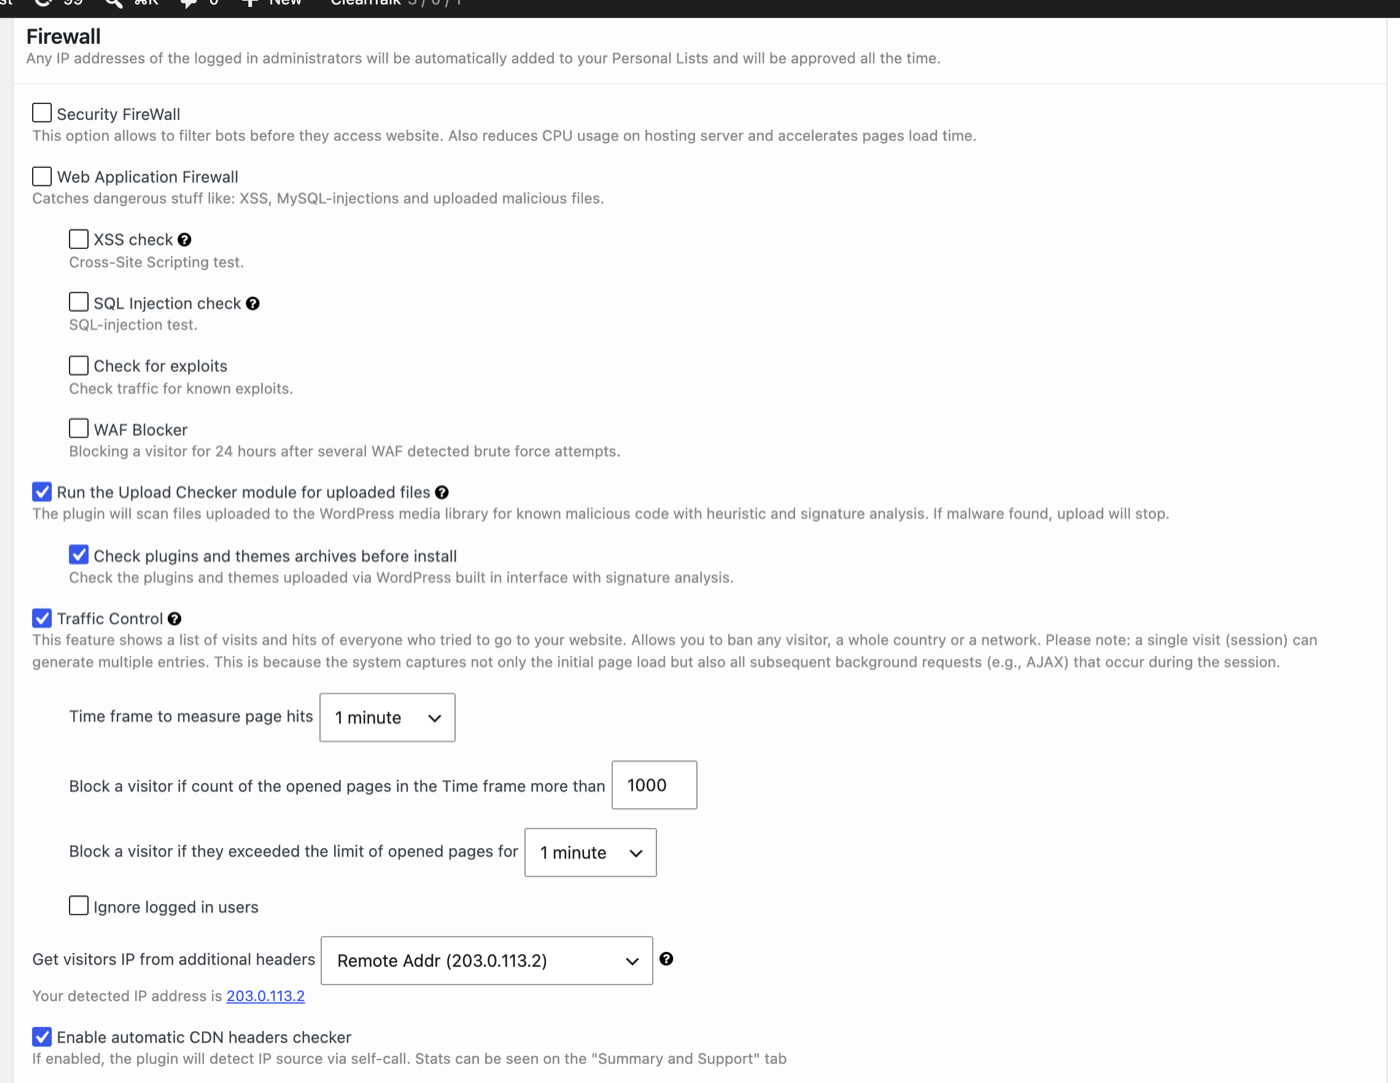
Scroll to the Firewall group. The first checkbox is Security FireWall. Note the line above it: "Any IP addresses of the logged in administrators will be automatically added to your Personal Lists and will be approved all the time." — this is what prevents you from locking yourself out of your own site.

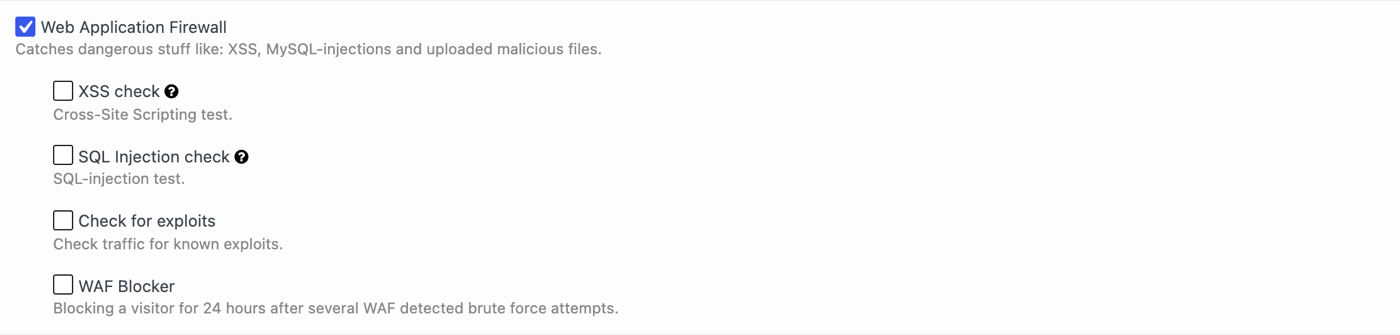
4. Turn on the Web Application Firewall
Tick Web Application Firewall, then enable the sub-checks you need:
- XSS check — Cross-Site Scripting test.
- SQL Injection check — SQL-injection test.
- Check for exploits — checks traffic against known exploit patterns.
- WAF Blocker — blocks a visitor for 24 hours after several attacks detected by the WAF, so a scanner is removed after its first few probes instead of being filtered request by request.
Just below sits Run the Upload Checker module for uploaded files, which scans files uploaded to the media library with heuristic and signature analysis and stops the upload if malware is found, plus Check plugins and themes archives before install for ZIP archives uploaded through the WordPress interface.

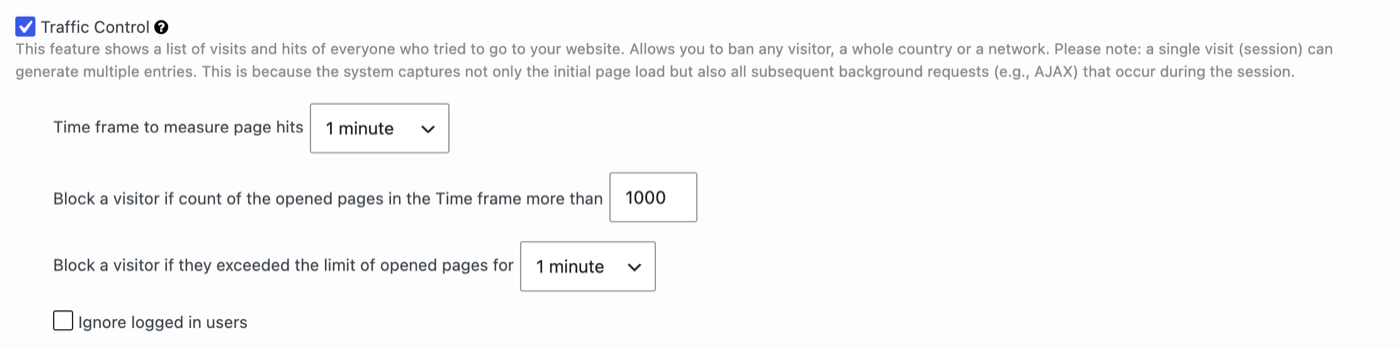
5. Configure Traffic Control limits
Tick Traffic Control and set four values: the counting window (Time frame to measure page hits), the hit limit (1000 by default), how long a block lasts, and, optionally, Ignore logged in users so authenticated sessions are not counted.
6. Tell the plugin where to read the visitor IP
If your site sits behind Cloudflare, another CDN or a reverse proxy, set Get visitors IP from additional headers to the header your provider sends, and leave Enable automatic CDN headers checker enabled so the plugin can verify the source itself.

7. Save and verify
Click Save Changes at the bottom of the page.
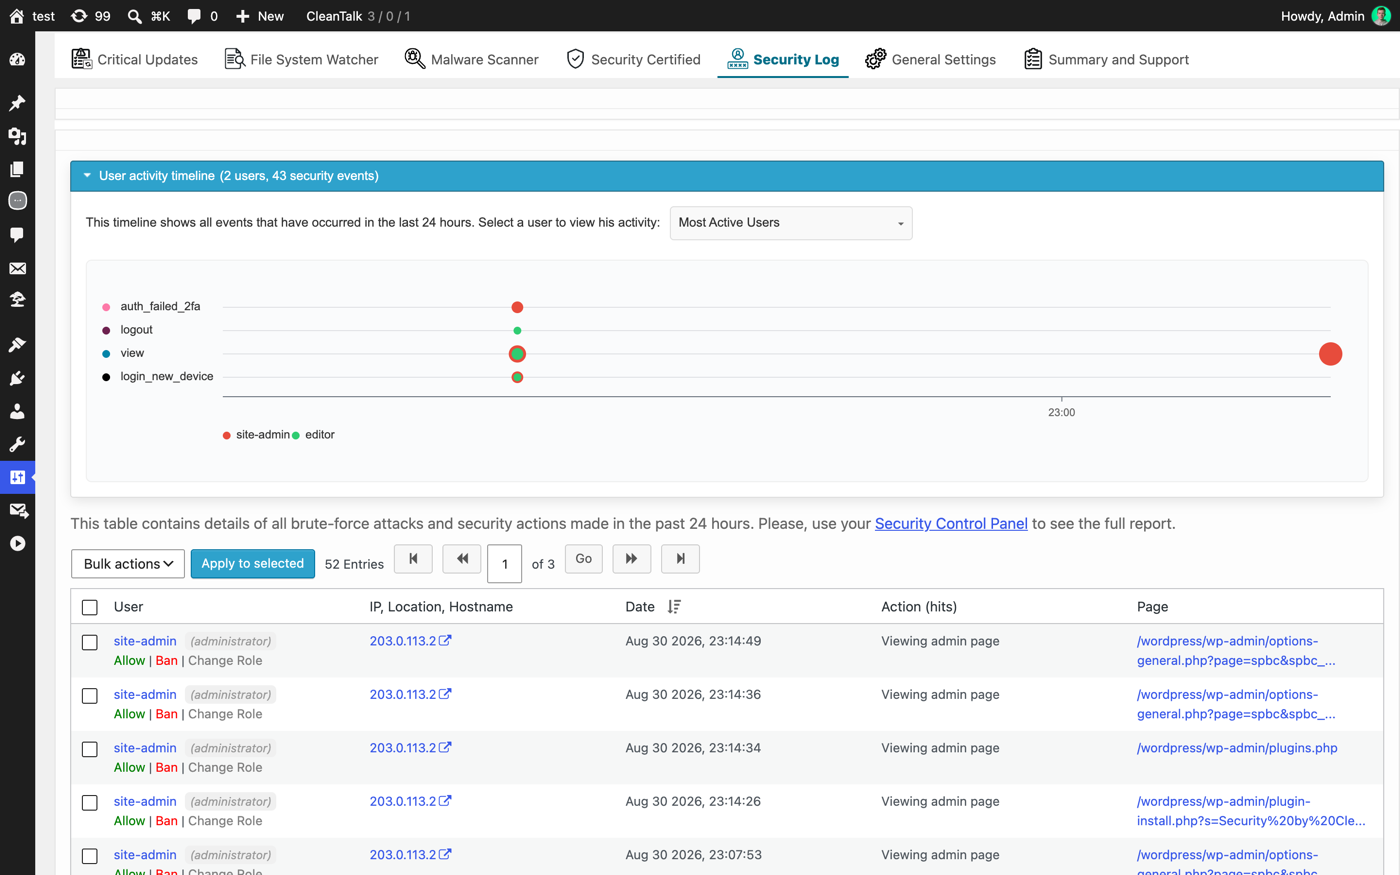
Then open the Security Log tab. It lists security actions and brute-force attempts of the last 24 hours with the user, IP address, date, action and page, and each row has Allow | Ban | Change Role controls. The full history lives in the cloud Security Control Panel.
The Summary and Support tab confirms that the modules are live: it shows how many networks the firewall database holds, when it was last updated, and when events were last sent to the cloud.
How Traffic Control counts hits
Traffic Control counts hits, not visits, and the difference decides whether your limit is safe. The plugin states it plainly: "a single visit (session) can generate multiple entries. This is because the system captures not only the initial page load but also all subsequent background requests (e.g., AJAX)."
A WooCommerce checkout, a filtered product listing or an admin session generates several times more hits than pages viewed. Start loose and tighten later: leave the default limit for a week, look at what real sessions produce in the Security Log, then lower it. Turning on Ignore logged in users takes editors, shop managers and logged-in customers out of the equation entirely, which is usually the right call for membership and e-commerce sites.
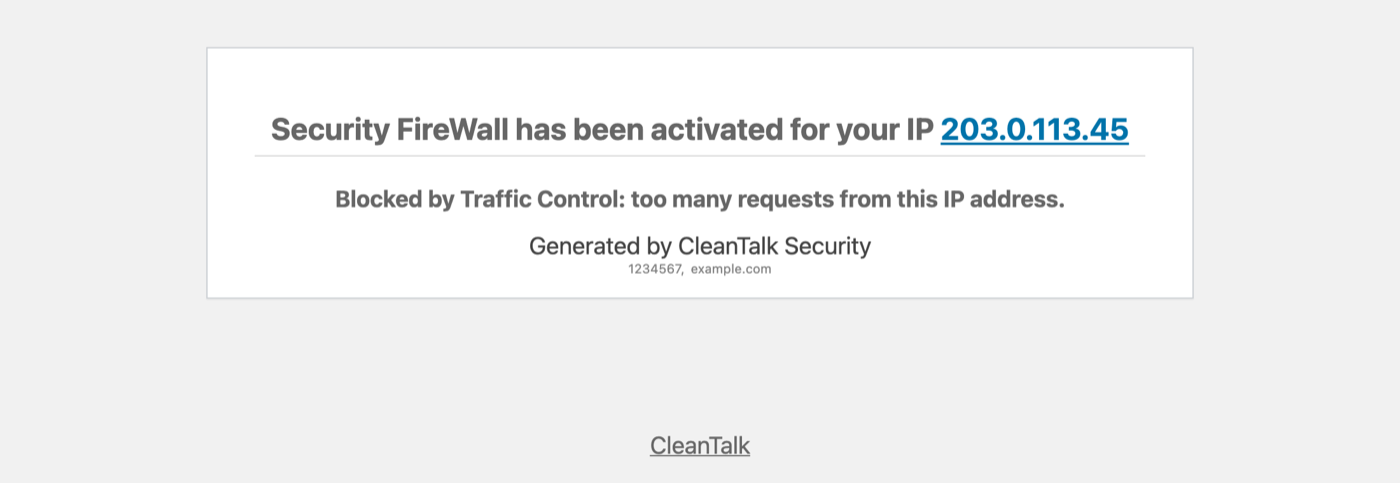
When the limit is exceeded, the address is blocked for the period you configured and every further request gets the Traffic Control block page instead of your theme — so the flood stops costing you PHP workers immediately.
Running behind Cloudflare or another CDN
If the site is proxied, every request arrives with the proxy’s IP address in REMOTE_ADDR, and the visitor’s real address is in a header such as CF-Connecting-IP or X-Forwarded-For. Leaving this misconfigured is the single most common firewall mistake: with the wrong IP source Traffic Control sees one address for the whole world and either blocks every visitor at once or never triggers at all, while the Security FireWall filters reputation data for your CDN instead of your attackers.
The Enable automatic CDN headers checker option solves this without guesswork — the plugin performs a self-call, detects which header carries the real address, and reports the result on the Summary and Support tab.
Blocking by IP, network and country
Individual blocking rules — a single IP, a whole subnet, or an entire country — live in your Personal Lists in the CleanTalk dashboard, and the plugin syncs them down to the site. Two behaviours are worth knowing:
- Administrator IPs are added to the allow list automatically while you are logged in.
- Search engine crawlers are not blocked by country rules. Google, Bing, Yahoo, Baidu and Yandex bots are recognised and let through, which is why country blocking does not cost you indexing.
Country blocking is a blunt instrument, and it is the right one in two cases: a local business whose customers are all in one or two countries, and a site under a sustained flood from a region it does not serve. Otherwise, reputation filtering plus rate limiting does more with less risk.
What a blocked visitor sees
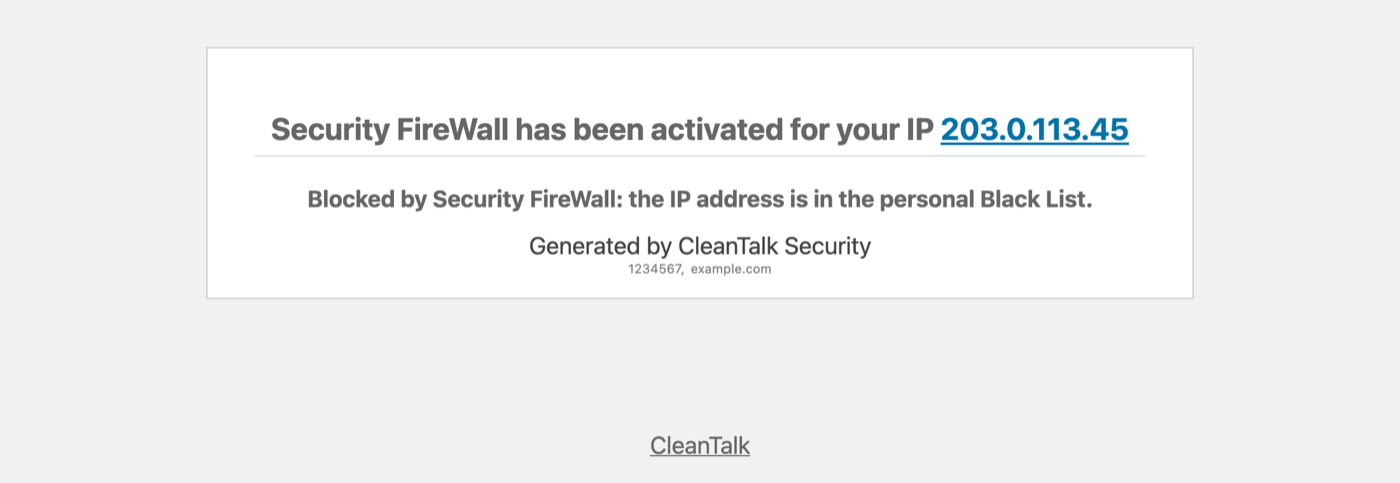
Blocked requests never reach your theme. The plugin serves its own page, naming the module that made the decision and the IP address it saw — which makes false positives easy to diagnose, because the visitor can send you a screenshot with everything you need.
Alternative ways to block IPs, countries and floods
CleanTalk is not the only option, and the honest answer is that the best setup usually combines two layers — one at the edge, one inside WordPress.
| Solution | Blocks by IP / network | Country blocking | Rate limiting | Runs before WordPress loads | Notes |
|---|---|---|---|---|---|
| Security by CleanTalk | Yes, cloud list + personal lists | Yes | Yes (Traffic Control) | Yes, early in the request | Cloud reputation data, $9/year |
| Wordfence | Yes | Paid tier | Yes | Only with "Extended Protection" enabled | Large rule set, heavier on the database |
| Cloudflare | Yes | Yes (free plan) | Yes (rate limiting rules) | Yes, at the edge | Traffic never reaches your server; needs DNS migration |
| Solid Security | Yes | Via integrations | Basic | No | Focused on hardening and logins |
| IP2Location Country Blocker | No | Yes | No | No | Single-purpose, free |
| .htaccess / nginx `deny` | Yes | Only with a GeoIP module | No | Yes, in the web server | Manual, no logging, easy to break |
| fail2ban | Yes | No | Yes (log-driven bans) | Yes, at the OS firewall | Needs root and a VPS; not available on shared hosting |
A short verdict on each:
- Cloudflare is the strongest edge layer and is complementary rather than competitive: it filters volume before your server sees it, while an in-WordPress firewall knows the WordPress context — which user, which role, which admin page.
- Wordfence overlaps most closely. Its firewall runs at PHP level and reaches full effectiveness only after the Extended Protection step that modifies your PHP configuration.
- Single-purpose plugins such as country blockers are fine if that is genuinely all you need; they give you no reputation data and no rate limiting.
- Server-level rules (.htaccess, nginx deny, fail2ban) are fast, free and right for permanently blocking a known bad network — but they do not scale to thousands of rotating addresses and leave you nothing to review afterwards.
Frequently asked questions
Will a firewall block me out of my own site?
No — administrator IP addresses are added to your Personal Lists automatically while you are logged in. If you do lose access after a configuration change, the block can be removed from the CleanTalk dashboard, or the plugin can be deactivated over SFTP by renaming its folder in wp-content/plugins/.
Does country blocking hurt SEO?
It does not affect crawling, because bots of Google, Bing, Yahoo, Baidu and Yandex are recognised and allowed through regardless of country rules. It does affect real users in the blocked country, so block only regions you genuinely do not serve.
Does the firewall work behind Cloudflare or a CDN?
Yes, provided you set Get visitors IP from additional headers to the header your CDN sends, or leave the automatic CDN headers checker enabled so the plugin detects it. Without that, all requests appear to come from the CDN’s addresses.
Is Traffic Control the same as DDoS protection?
No. Traffic Control limits how many pages one IP address can open in a time frame, which stops scrapers, aggressive crawlers and small floods. A volumetric DDoS attack has to be absorbed before it reaches your server, which is a job for a CDN or your hosting provider.
Does a firewall plugin slow the site down?
Blocked requests are terminated before WordPress finishes loading, so filtered bot traffic consumes less CPU than it would if served normally. The trade-off is a small check on every request; the plugin’s release process includes PageSpeed Insights and GTmetrix verification.
What happens to false positives?
Every block is written to the Security Log tab and to the cloud Security Control Panel with the IP address, the reason and the page, and the address can be moved to the allow list from there. The block page names the module and the IP, so a screenshot from a customer is enough to identify the rule.
Is the plugin free?
The plugin is free and has no PRO version. It requires an access key for the cloud service, which is free during the trial and then $9 per year; all features are available on every account.
Do I still need a malware scanner if I have a firewall?
Yes. A firewall filters incoming requests; it does not tell you whether something already got in — through a vulnerable plugin, a stolen password or a compromised hosting account. The same plugin ships a malware scanner with signature and cloud analysis, heuristics and a binary check for ELF files, plus a File System Watcher for file changes.
Get started
Install Security by CleanTalk, get an access key, and switch on the Security FireWall, WAF and Traffic Control — you will see the first blocked requests in the Security Log within a day.
Sign up for CleanTalk — free trial — firewall, malware scanning, brute-force protection and 2FA for your WordPress site.